Drilling Into New Concrete A Comprehensive Guide
When it comes to drilling into new concrete, proper techniques and tools are essential to ensure a successful and safe project. Whether you’re installing anchors, creating openings for pipes, or mounting fixtures, the following comprehensive guide will walk you through the steps and considerations for drilling into fresh concrete.
Choose the Right Drill
Selecting the appropriate drill is the first crucial step. A hammer drill or a rotary hammer drill is generally recommended for concrete drilling. These drills are designed to apply a pulsating force while rotating, making them more effective in penetrating hard surfaces.
Select the Right Drill Bit
Equally important is choosing the right drill bit. Carbide-tipped masonry bits are specifically designed for concrete drilling. Ensure the bit size matches the diameter of the anchor or screw you plan to use.
Wear Safety Gear
Safety should always be a top priority. Wear safety goggles, ear protection, a dust mask, and work gloves to protect yourself from potential hazards such as flying debris and noise.
Mark Your Drilling Points
Precise measurements and marking are crucial for accurate drilling. Use a pencil or chalk to mark the exact points where you want to drill. Double-check your measurements to avoid any errors.
Secure the Work Area
Before you begin drilling, make sure the work area is secure. Remove any obstacles or debris that may hinder your movement. Secure the concrete surface with clamps or anchors to prevent it from shifting during drilling.
Control Dust
Concrete drilling produces a significant amount of dust. Use a vacuum attachment on your drill or a separate vacuum to control dust and keep the work area clean. Inhaling concrete dust can be harmful to your health.
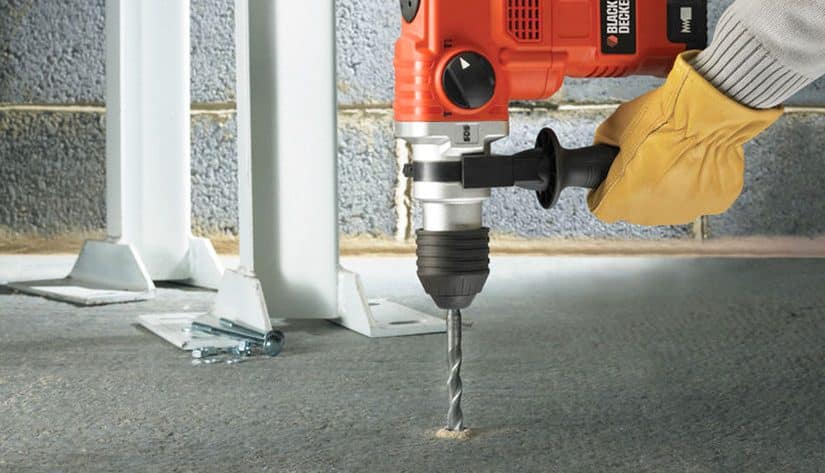
Start with a Pilot Hole
Begin by drilling a small pilot hole at each marked point. This helps guide the larger drill bit and ensures more accurate drilling. Apply steady, even pressure, and keep the drill perpendicular to the surface.
Use Proper Technique
When drilling into concrete, it’s important to use the right technique. Apply steady and consistent pressure without forcing the drill. Allow the tool to do the work, and periodically withdraw the bit to clear away debris.
Keep the Drill Cool
Concrete drilling generates heat, which can affect the drill bit’s performance. To prevent overheating, periodically pause drilling and let the bit cool down. You can also use water or a specialized drilling lubricant to keep the bit cool.
Dealing with Rebar
If you encounter reinforcement bars (rebar) while drilling, use a specialized rebar-cutting drill bit or switch to a different location if possible. Drilling through rebar requires more effort and may damage standard bits.
Depth Control
Pay attention to the required depth for your holes. Most drills have depth control features, but you can also use masking tape on the bit to mark the desired depth.
Cleaning the Holes
After drilling, remove any remaining dust and debris from the holes. A bulb blower or a vacuum can be used to clean out the holes effectively.
Installing Anchors or Screws
Once the holes are clean and ready, proceed to install anchors or screws according to your project requirements. Follow the manufacturer’s guidelines for the specific anchor or screw you are using.
Seal the Holes (Optional)
If water penetration is a concern, consider sealing the drilled holes with an appropriate concrete sealer. This extra step helps prevent moisture from entering the drilled holes and potentially causing damage over time.
Post-Drilling Inspection
After completing the drilling and installation process, inspect the final work to ensure everything meets your specifications. Confirm that anchors are securely in place and that the drilled holes are clean and free from defects.
By following this comprehensive guide, you can approach drilling into new concrete with confidence, ensuring a successful and secure outcome for your construction or DIY project.