Unveiling the Secrets of Perfect Bathroom Ceiling Sheetrock Installation
In the world of home improvement, one crucial aspect that often goes unnoticed is the bathroom ceiling sheetrock. Whether you’re renovating your existing bathroom or building a new one from scratch, the choice of sheetrock can significantly impact the overall aesthetics and functionality of the space. In this comprehensive guide, we will delve into the intricacies of selecting, installing, and maintaining the perfect sheetrock for your bathroom ceiling.
Understanding the Importance of Bathroom Ceiling Sheetrock
Bathroom ceiling sheetrock plays a pivotal role in creating a durable and visually appealing ceiling. It serves as a protective layer, shielding your bathroom from moisture and potential water damage. The right sheetrock not only enhances the longevity of your ceiling but also contributes to a healthier indoor environment by preventing mold and mildew growth.
Choosing the Right Type of Sheetrock
Moisture-Resistant Sheetrock for Bathrooms
When it comes to bathrooms, where moisture levels are higher than in other areas of the house, opting for moisture-resistant sheetrock is imperative. This type of sheetrock is specifically designed to withstand the humid conditions prevalent in bathrooms, ensuring that your ceiling remains free from damage caused by water vapor.
Thickness Matters
In the realm of sheetrock, thickness is not just a number; it’s a crucial factor in determining the sturdiness and insulation capabilities of the material. For bathroom ceilings, consider a 1/2-inch thick sheetrock for optimal performance. This thickness strikes a perfect balance, offering both durability and ease of installation.
Step-by-Step Guide to Installing Bathroom Ceiling Sheetrock
Preparation is Key
Before embarking on the installation process, ensure that the ceiling surface is clean, dry, and free from any debris. Any existing sheetrock or damaged material should be removed to provide a clean slate for the new installation.
Measure Twice, Cut Once
Accurate measurements are the foundation of a flawless sheetrock installation. Measure the dimensions of your bathroom ceiling meticulously and mark the cutting lines on the sheetrock accordingly. A precise cut ensures a seamless fit, minimizing the need for extensive finishing work.
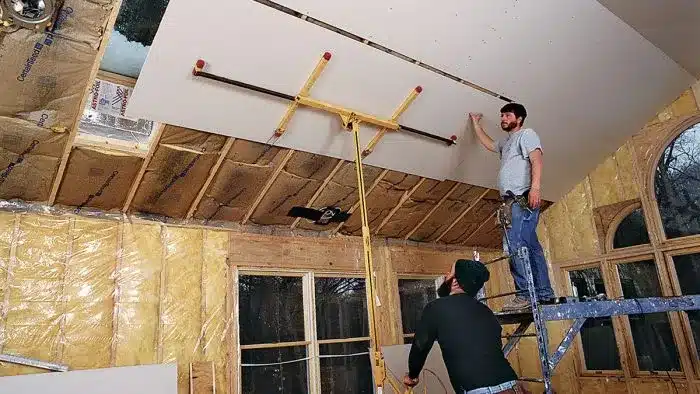
Secure and Install
Using appropriate screws, securely fasten the sheetrock to the ceiling joists. Ensure that the screws are evenly spaced and sunk slightly below the surface to facilitate the finishing process. A secure installation prevents sagging and promotes a smooth, polished appearance.
Taping and Mudding
To achieve a seamless finish, apply fiberglass mesh tape over the joints and corners of the sheetrock. Follow this with a layer of joint compound, commonly known as mud, to conceal the seams. Sand the surface once the compound dries for a smooth, professional look.
Priming and Painting
After the mudding and sanding process, apply a coat of primer to prepare the surface for painting. Opt for a moisture-resistant paint to further fortify your bathroom ceiling against the effects of humidity.
Maintenance Tips for Prolonged Sheetrock Lifespan
To ensure your bathroom ceiling sheetrock stands the test of time, consider these maintenance tips:
Regularly inspect for signs of water damage or leaks.
Address any cracks or chips promptly with a quick patching job.
Keep the bathroom well-ventilated to reduce humidity levels.
By following these guidelines, you not only ensure the longevity of your bathroom ceiling sheetrock but also contribute to a visually stunning and functional bathroom space.