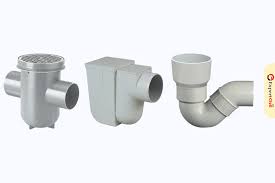
The Ultimate Guide to Installing Gully Traps in Your Home
Gully traps are an essential component of your home’s drainage system, helping to prevent blockages and unpleasant odors. Whether you’re building a new house or renovating an existing one, understanding how to install gully traps is crucial. In this ultimate guide, we’ll take you through the steps to install gully traps in your home.
Gather Your Tools and Materials:
Before you start, make sure you have all the necessary tools and materials ready. You’ll need a gully trap, PVC pipes, pipe fittings, a pipe saw, pipe glue, a spirit level, a tape measure, and safety gear like gloves and safety glasses.
Choose the Location:
Select an appropriate location for your gully trap. It should be strategically placed to collect wastewater, preferably near areas where water drainage is essential, such as kitchens, bathrooms, and laundry rooms. The gully trap should be easily accessible for cleaning and maintenance.
Dig the Hole:
Using a shovel, dig a hole deep enough to accommodate the gully trap. Ensure that the gully trap is level with the ground surface to allow water to flow into it smoothly. Use a spirit level to verify its alignment.
Install the Gully Trap:
Place the gully trap into the hole you’ve dug. Make sure that the inlet is level with the surrounding ground and securely positioned. You may need to adjust the height using sand or gravel to achieve the desired level.
Connect the Pipes:
Measure the distance from the gully trap’s outlet to the drainage system in your home. Cut the required length of PVC pipe using a pipe saw, and connect it to the outlet of the gully trap using pipe fittings and pipe glue. Ensure that all connections are secure and leak-free.
Maintain the Right Gradient:
Maintaining the correct gradient is essential for proper drainage. Aim for a gradient of at least 1:40 (25 mm per meter) from the gully trap to the drainage system. Use a spirit level to verify that the pipes are sloping in the correct direction.
Ventilation:
To prevent odors and ensure efficient drainage, you need to install ventilation. Attach a ventilation pipe to the gully trap. The pipe should extend above the roofline, allowing air to flow freely and preventing the buildup of gases.
Secure the System:
Properly secure the entire system with pipe clamps, especially where pipes meet or change direction. This ensures that the pipes stay in place and do not sag over time.
Test the System:
Before filling in the hole, it’s crucial to test your gully trap and drainage system. Pour water into the gully trap to ensure it flows smoothly through the pipes without any leaks or blockages. Address any issues before proceeding.
Backfill and Restore the Surface:
Once you’re confident that your gully trap and drainage system are working correctly, backfill the hole with soil. Tamp it down to ensure it’s compacted and level with the surrounding ground. You can then restore the surface with sod or other landscaping materials.
Regular Maintenance:
To keep your gully trap functioning correctly, you must perform regular maintenance. This includes removing any debris that may accumulate in the trap, checking for blockages in the pipes, and ensuring that the ventilation system remains clear.
Compliance with Regulations:
Make sure your installation complies with local building codes and regulations. Some areas may have specific requirements regarding gully traps, such as minimum distances from buildings or water sources.
In conclusion
installing gully traps in your home is a vital aspect of your drainage system. Proper installation and maintenance will help prevent clogs, odors, and costly repairs. Following this ultimate guide, you can ensure that your gully trap is installed correctly and functions effectively for years to come